Ventoy Ventoy
Get Ventoy
Download
Ventoy multiboot USB tool branding and boot environment

Open source · UEFI & BIOS

One USB stick. Many ISOs. Pick an OS at boot.

Ventoy formats your drive once, then you simply copy ISO, WIM, IMG, VHD(x), and EFI files onto it. Reboot, choose a menu entry, and go—no need to reflash the stick for every new image.

This site is an independent English guide. Ventoy is developed by longpanda; always verify downloads using SHA-256 hashes from the official Ventoy download page or release notes.

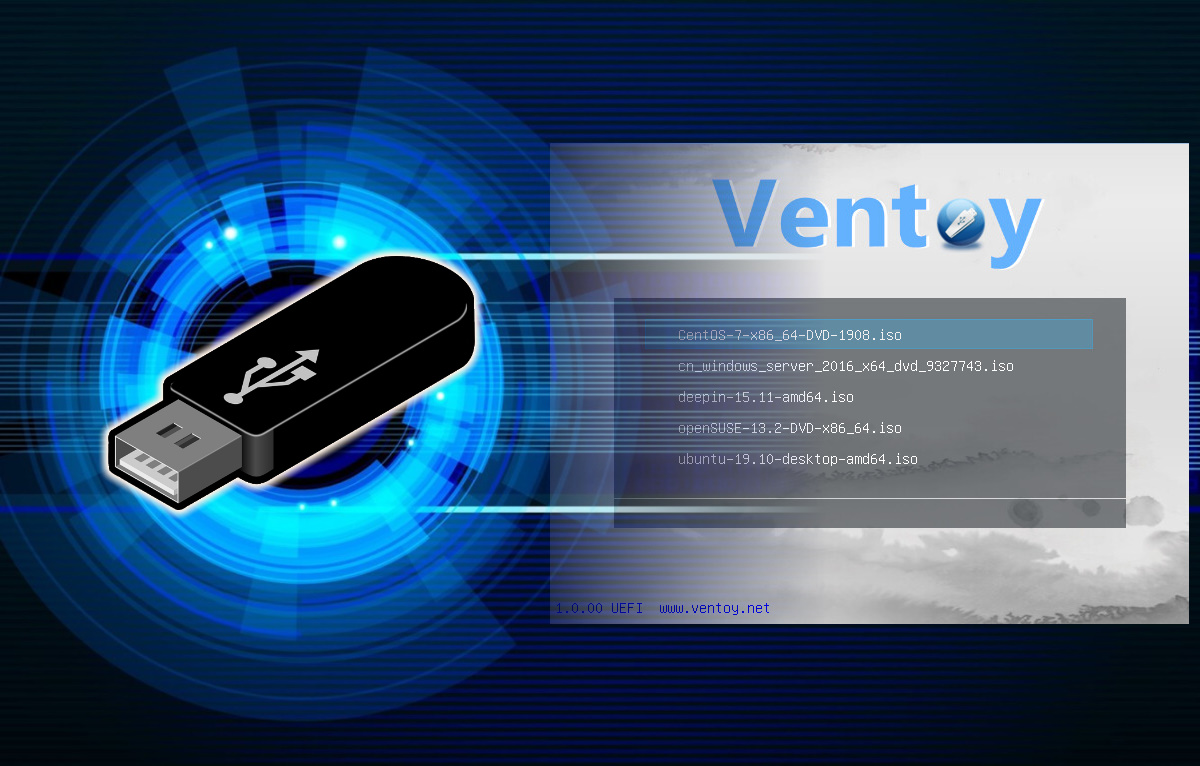
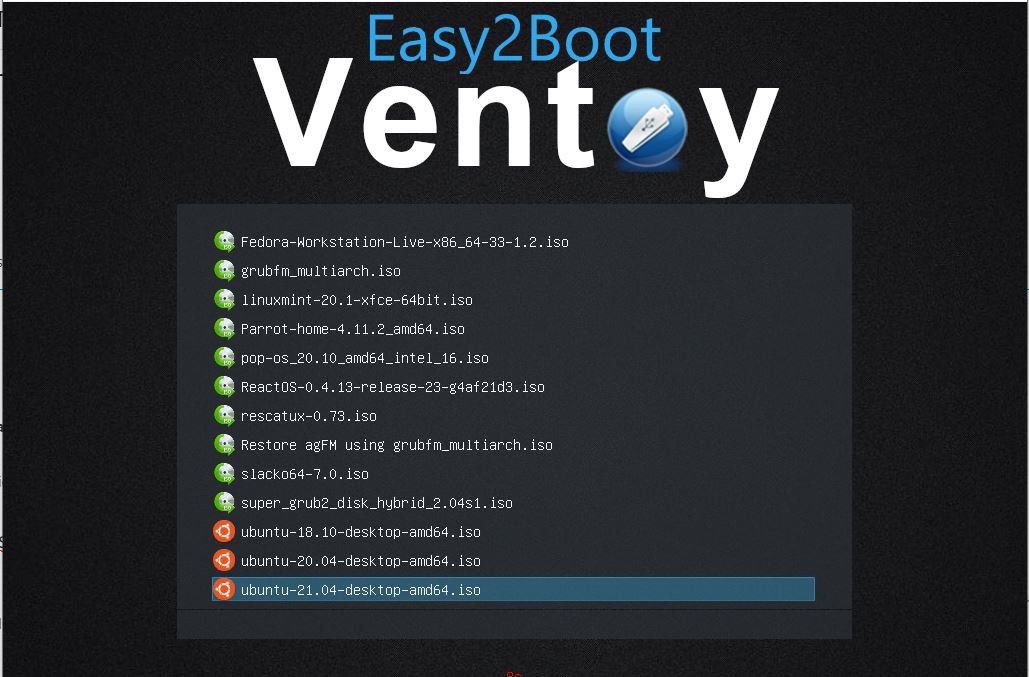
Ventoy multiboot menu with multiple ISO images available at startup
At boot, Ventoy shows a menu of every supported file you copied to the USB—Linux distros, Windows installers, rescue discs, and more.
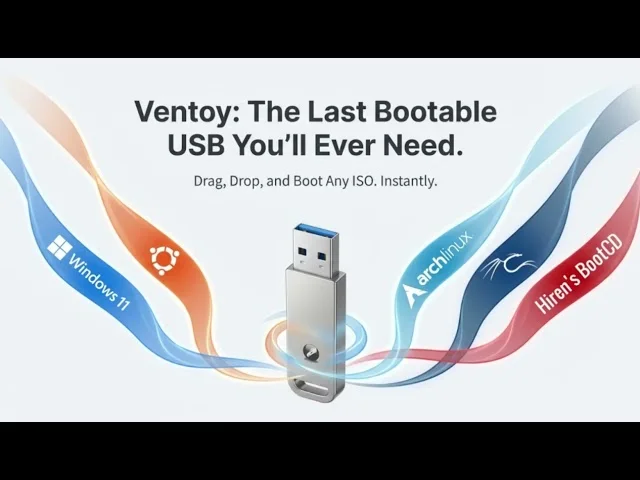
Ventoy as a single bootable USB carrying multiple system images
After the first install, updating your toolkit is just drag-and-drop: add, rename, or delete ISOs like normal files on the data partition.

Why people choose Ventoy

Compared with writing one image at a time, Ventoy is built around a simple idea: treat the USB like storage that also happens to boot. That workflow saves time for IT staff, students, and hobbyists who juggle several live systems or installers.

  • Multiboot without re-imaging

    Keep Ubuntu, Debian, Windows 11, memtest, and a recovery ISO on the same drive. Swap files when you need to—no second tool required for each ISO.

  • Fast iteration

    Download a new nightly or point release, copy it over, reboot. Ideal when you are testing distros or building a classroom image set.

  • UEFI & Secure Boot paths

    Ventoy supports UEFI and Legacy BIOS. Secure Boot often works after enrolling Ventoy’s key or following the documented MOK process—details vary by machine and firmware.

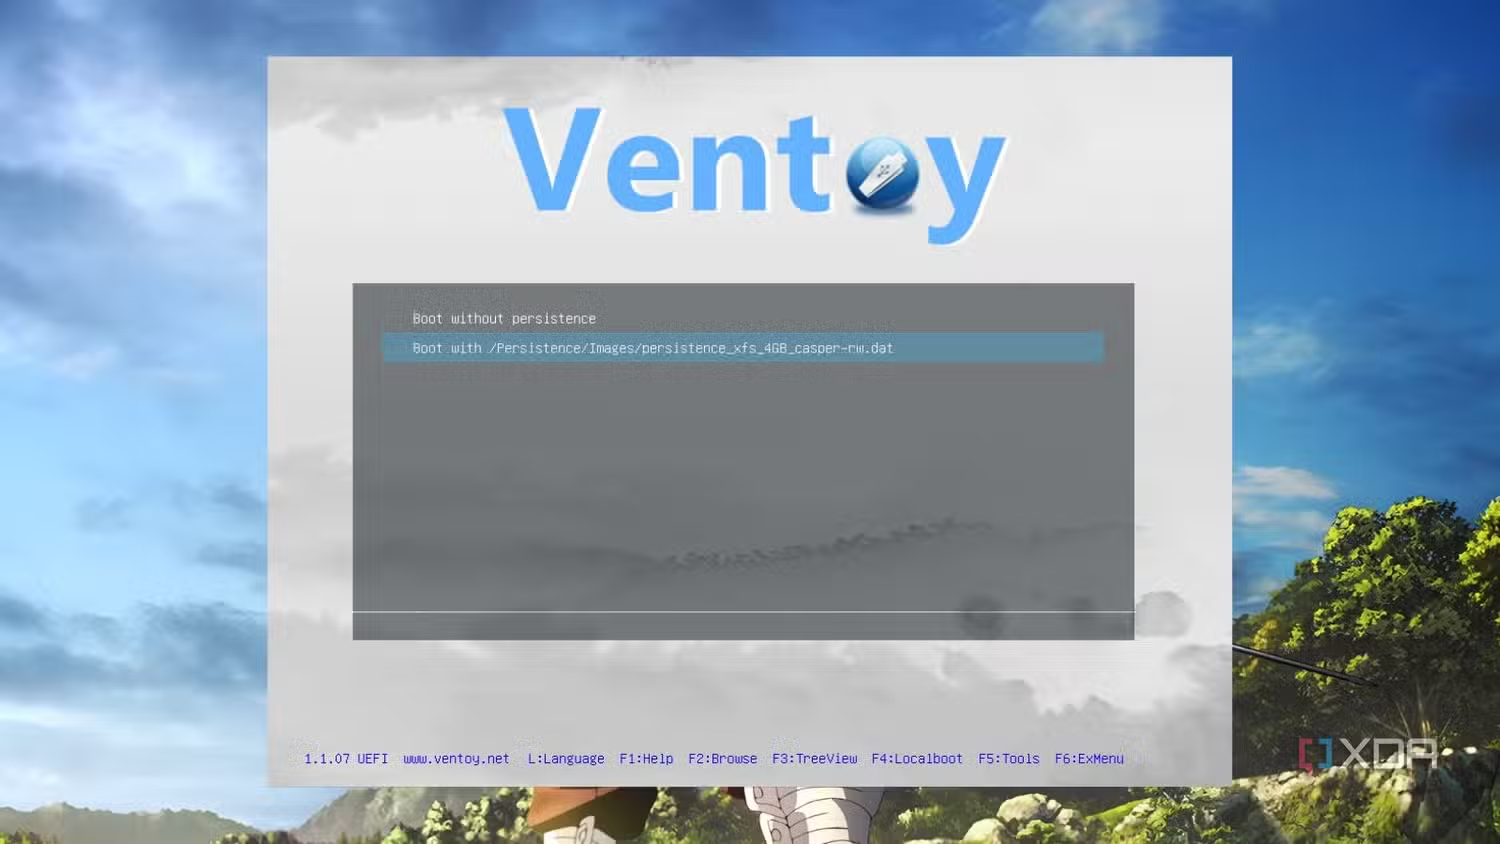
  • Ventoy persistence option for Ubuntu shown in a virtual machine

    Plugins & persistence

    Optional plugins extend themes, auto install scripts, and persistence for supported Linux ISOs—check the official plugin documentation for your distro.

Custom Ventoy boot menu with a graphical theme applied
Theme plugins can replace the default menu look—use official plugin packs and docs so updates stay compatible with your Ventoy version.

How it works (conceptually)

  1. 1

    Install Ventoy to the USB

    Run the Ventoy installer (Windows executable or Linux script). It partitions the device: a small EFI/boot area for Ventoy itself and a large exFAT/NTFS/FAT32 space for your files.

  2. 2

    Copy ISOs like ordinary files

    Use your file manager. You can organize subfolders; Ventoy can scan them depending on version and settings. Very large files are supported when the filesystem allows.

  3. 3

    Boot and select an entry

    Firmware loads Ventoy, which presents a menu mapped to your ISOs. The selected image is exposed to the OS installer or live session without extracting to the stick first.

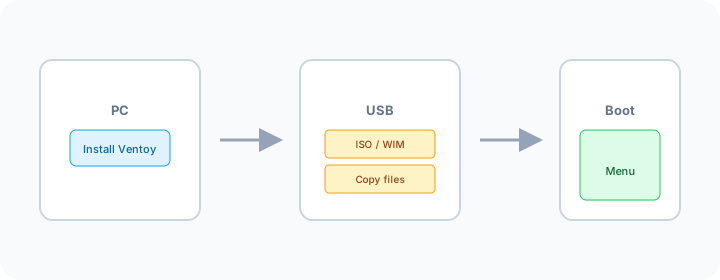
Diagram: install Ventoy from a PC, copy ISO or WIM files onto the USB, then boot and choose from the Ventoy menu
The same three steps as above: install Ventoy once, copy images to the USB, reboot and pick an entry—no need to reflash for each new ISO.

Requirements & compatibility notes

Host PC (where you install Ventoy)

  • Windows (installer GUI) or Linux (shell scripts)—see official docs for supported distros.
  • Administrator or root rights to write partition tables to the USB device.
  • A USB flash drive or external SSD/HDD; back up data first—installation erases the target disk.

Target machine (where you boot)

  • UEFI or Legacy BIOS firmware; some very old systems may need extra tweaks.
  • Individual ISOs may have their own limits (RAM, GPU, TPM for Windows 11, etc.).
  • Always check Ventoy’s tested ISO list and your distro’s release notes.

Download Ventoy safely

Use the direct download card below (link refreshes each page load). For classic mirrors, browse SourceForge or the Gitee card. Always compare the SHA-256 hash with the official Ventoy download page or the mirror you used.

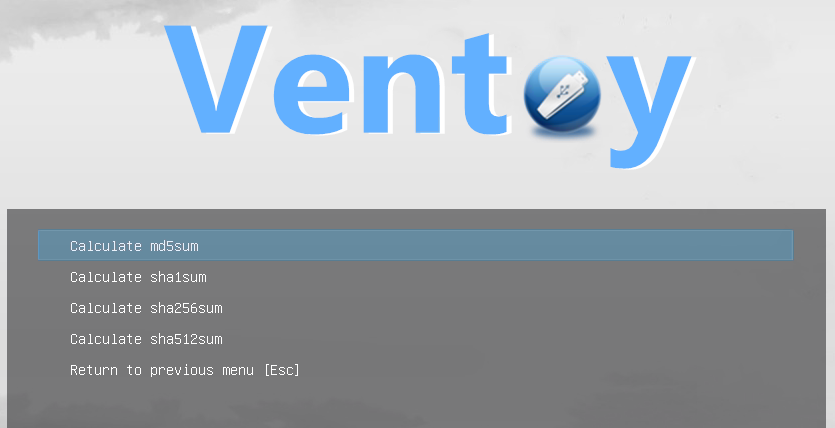
SHA-256 checksum verification example for a Ventoy release file
Compare the published SHA-256 (from ventoy.net or the mirror’s release page) with a local checksum tool before you extract or run installers—this catches corrupted or tampered downloads.

Security habit

Do not trust random re-uploads on file hosts. Prefer SourceForge, Gitee, or links listed on ventoy.net/en/download.html. Verify hashes every time you download a new version.

Installation outline

Windows (Ventoy2Disk.exe)

  1. Extract the ZIP from the official mirror. Run Ventoy2Disk.exe as administrator.
  2. Select the correct USB device (double-check the drive letter and size).
  3. Choose GPT or MBR partition style to match your target PCs (GPT is typical for modern UEFI systems).
  4. Click Install. When finished, copy ISO files to the large partition.
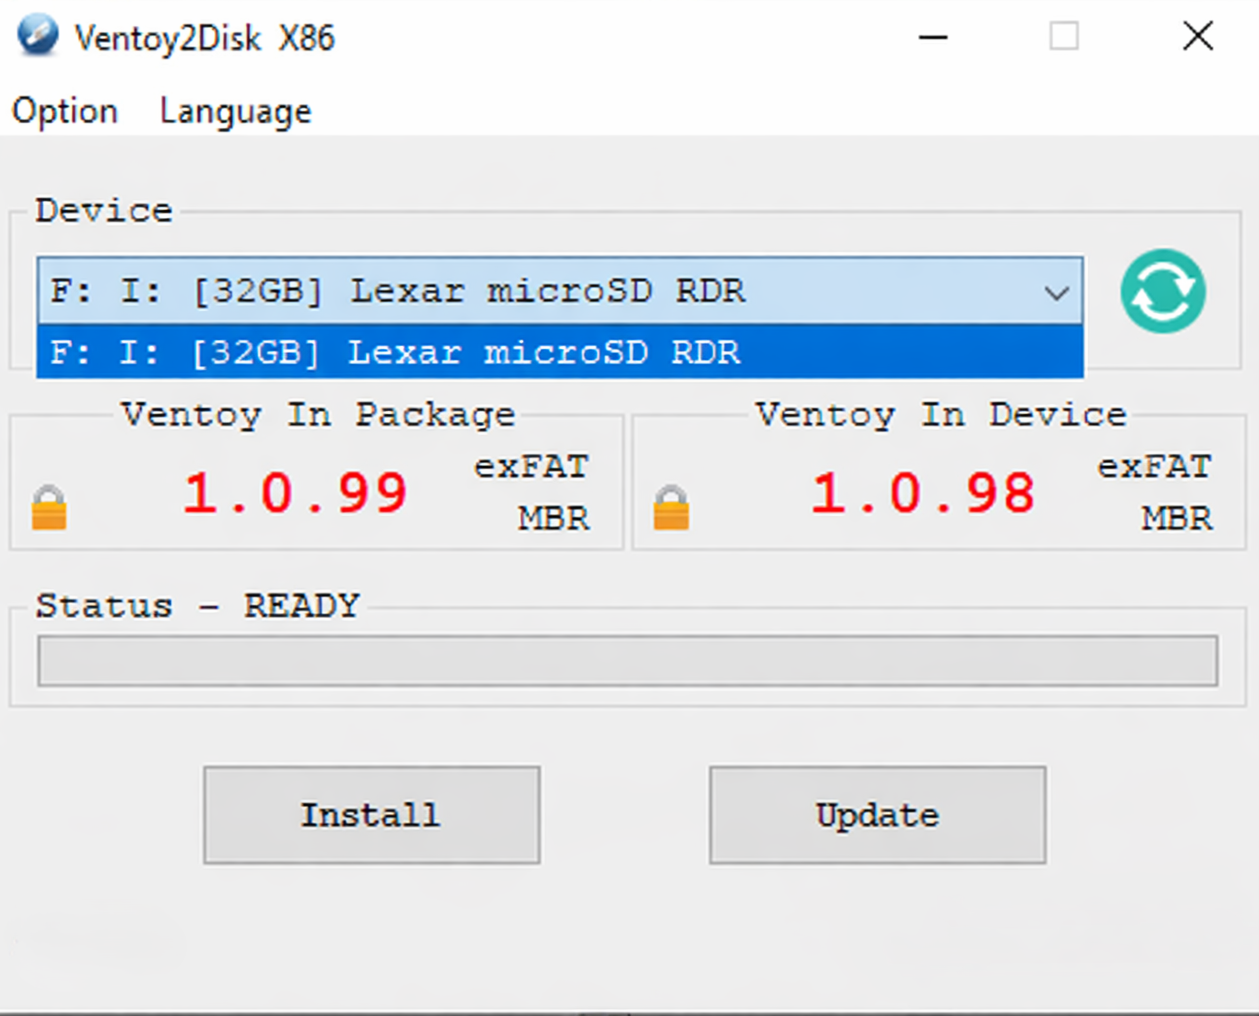
Ventoy2Disk.exe on Windows: device selection, partition style, and install controls

Full Ventoy2Disk window on Windows. Double-check the selected device before installing.
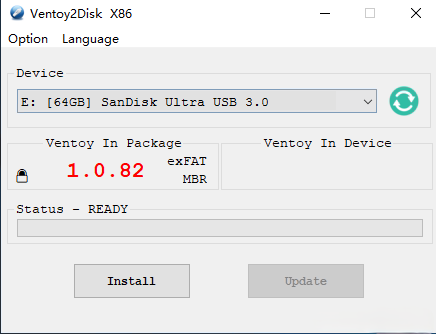
Ventoy2Disk compact GUI overview

Linux (script)

  1. Extract the package, open a terminal in that folder, and run the provided shell script (e.g. sudo ./Ventoy2Disk.sh -i /dev/sdX—replace sdX with your device, never guess).
  2. Use lsblk to confirm the block device before you wipe it.
  3. Mount the data partition and copy ISOs with your file manager or cp.

What users often report (typical scenarios)

The following patterns come from common forum posts and FAQs (paraphrased for clarity). They are not quotes from identified individuals; treat them as starting points and confirm against your hardware and Ventoy version.

“I support a small office. One Ventoy stick carries our Windows image, a live Linux for disk checks, and firmware update ISOs. When Windows 11 revisions ship, I only replace one file.”

Typical IT / helpdesk workflow

“My laptop only likes exFAT for large ISOs. I formatted the Ventoy data partition accordingly after checking the docs—then Fedora and Ubuntu live images both appeared in the menu.”

Filesystem choice

“Secure Boot blocked Ventoy until I followed the MOK enrollment steps. After that, BitLocker and corporate policies still applied to the internal drive—only the USB chain changed.”

UEFI Secure Boot

“A single ISO failed with a black screen; others worked. Updating Ventoy to the latest release and retrying with the ISO’s ‘compatible’ mode in the Ventoy menu solved it.”

Per-ISO quirks

Troubleshooting & fixes

PC boots straight to the internal OS, not Ventoy

Open firmware settings (UEFI). Disable “fast boot” where relevant, enable USB boot, and move the USB device above the internal disk in the boot order. On some boards you must use a one-time boot menu (often F8, F11, or F12).

“Secure Boot” error on UEFI

Read Ventoy’s Secure Boot section in the official documentation. You may need to enroll the Ventoy key, temporarily disable Secure Boot for installation only, or update firmware. Corporate-managed laptops may block unsigned bootloaders entirely.

ISO appears in the menu but the installer crashes

Verify the ISO checksum from the distributor. Try Ventoy’s GRUB2 or memdisk modes if offered for that entry. Search the Ventoy forum for your distro name plus “Ventoy” and your symptom—often someone already posted a workaround.

Wrong disk selected in the installer

When installing an OS from Ventoy, installers still show all disks. Never format the Ventoy USB by mistake. Read size labels carefully; disconnect spare drives if you are unsure.

Ventoy version vs. new distro release

Linux kernels and Windows media evolve. If a brand-new ISO fails, update Ventoy first, then retest. The official news / changelog lists fixes per release.

Frequently asked questions

Is Ventoy free for commercial use?
Ventoy is open source (GPLv3+). Review the license in the official repository for redistribution terms.
Can I use the same stick on Mac hardware?
Ventoy targets PC-style UEFI/BIOS boot. Apple Silicon and Intel Macs have different boot chains; do not expect macOS-targeted behavior from Ventoy without extra research.
Ventoy vs. Rufus or balenaEtcher?
Rufus and Etcher excel at flashing a single image. Ventoy shines when you routinely swap or stack many ISOs on one drive. Many people keep both tool types available.
Will Windows To Go or portable apps run from the same partition?
The large partition is normal storage; you can store portable tools there. Running Windows “To Go” style setups is a separate topic—follow Microsoft licensing and Ventoy plugin docs if applicable.

Official Ventoy resources

These links go straight to the Ventoy project—use them to verify releases, read documentation, and reach community support.

Extended reference — 33 deep-dive topics

The sections below expand on workflows, hardware, firmware, and edge cases. They complement (rather than repeat) the overview, features, and primary FAQ above.

Glossary of terms you will see around Ventoy

ISO image
A file that represents an optical disc. Ventoy can boot many ISOs without extracting them to loose files on the USB.
WIM (Windows Imaging Format)
Microsoft’s file-based image format. Some recovery and deployment tools ship as WIM; Ventoy can list supported WIM files alongside ISOs.
UEFI
Modern firmware that replaces classic BIOS. It uses GPT partitioning and often Secure Boot. Ventoy supports UEFI boot paths when the stick is prepared correctly.
Legacy BIOS / CSM
Compatibility mode that emulates older BIOS behaviour. Needed on some older PCs; Ventoy can be installed with MBR layout for broader legacy support.
Persistence (Linux)
Saving changes across reboots on a live USB. Not every ISO supports it; Ventoy plugins and distro-specific layouts control whether persistence appears.
MOK / Secure Boot keys
Machine Owner Key enrollment lets you trust a bootloader under Secure Boot. Follow official Ventoy docs—wrong steps can lock you out until you reset keys.

GPT versus MBR: what to pick when installing Ventoy

GPT (GUID Partition Table) pairs naturally with UEFI machines built in the last decade. It supports large disks and many partitions. MBR (Master Boot Record) is the older scheme; it is still relevant when you must boot the same stick on very old systems that lack UEFI or when firmware is finicky about hybrid setups.

If your target fleet is mostly UEFI laptops and desktops from roughly 2012 onward, GPT is usually the default. If you still maintain a legacy lab or industrial PC with only BIOS, confirm whether those machines can boot USB at all—some need updated firmware or a different USB port.

  • Reinstalling Ventoy with a different scheme wipes the stick—back up ISOs elsewhere first.
  • Windows installers may convert internal disks independently; Ventoy does not change your internal drive unless you run an installer and confirm destructive steps.

Choosing exFAT, NTFS, or FAT32 on the data partition

The large partition that holds your ISOs behaves like normal storage. exFAT avoids the 4 GiB per-file limit of FAT32 and is widely readable on Windows and many Linux desktops—useful for single large Windows images. NTFS is native to Windows and handles large files well; some Linux live environments mount NTFS read/write reliably, others are read-only unless you add drivers. FAT32 maximizes compatibility with older firmware but breaks when any single file exceeds 4 GiB.

When in doubt, check the Ventoy documentation for your release: supported filesystems and default behaviour can shift between versions.

Linux distributions and ISO behaviour (general patterns)

Debian-family installers often probe firmware and disks early; if an ISO fails only in Ventoy, try the distro’s “safe graphics” or “compatibility” boot option from the menu. Rolling releases such as Arch ship frequent kernel bumps—pair them with a current Ventoy build. Ubuntu and Fedora sometimes change their live session layout between LTS and interim releases; always verify checksums after download.

Specialized security or forensics distros may assume read-only media or expect specific partition labels. Read that distro’s Ventoy notes if boot stalls at initramfs.

Windows 10 and 11 installation media

Microsoft’s consumer media is large; ensure your Ventoy data partition’s filesystem accepts the file size. Windows Setup still asks where to install—double-check you are targeting the internal NVMe or SSD, not the Ventoy USB. Feature updates and new builds refresh the installer UI slightly; screenshots you see online may not match pixel-for-pixel.

TPM and Secure Boot requirements for Windows 11 are enforced by Setup, not by Ventoy. If Setup refuses to continue, resolve firmware settings on the target PC first.

Protecting internal disks during OS installs

Ventoy only organizes boot entries; the installers you launch are third-party software with full disk access. Develop a habit: note the capacity and model name of your internal drive before you start. Disconnect secondary drives when performing risky partitioning if the machine allows it. On laptops with a single drive, read every confirmation dialog twice.

Treat “Erase disk” and “Format” as irreversible. When uncertain, stop and photograph the partition map.

USB sticks, enclosures, and speed expectations

USB 2.0 flash drives work for small Linux images but feel slow when copying multi-gigabyte ISOs. USB 3.x drives and quality controllers reduce wait time when refreshing your library. External SSDs in USB enclosures can outperform spinning disks and survive travel better than cheap thumb drives—useful for consultants who rebuild sticks weekly.

Avoid hubs that under-power devices during install operations; a dropped link mid-write can corrupt files on the stick.

Firmware checklist before blaming Ventoy

  1. Disable “fast boot” and similar shortcuts that skip USB enumeration.
  2. Confirm whether you need CSM/Legacy or pure UEFI—match the Ventoy partition style you used.
  3. Update BIOS/UEFI if the vendor ships security and USB fixes relevant to your model.
  4. Try another USB port (rear ports on towers often have cleaner power delivery).
  5. Reset firmware settings to defaults once if you inherited a used machine with unknown tweaks.

Updating Ventoy without losing your ISO library

Many users copy ISOs to a backup folder on another disk, upgrade Ventoy in place per official instructions, then copy ISOs back. In-place upgrade paths depend on version—read the release notes. After upgrading, smoke-test one Linux live image and one Windows installer before you rely on the stick for travel.

IT scenarios: classrooms, repair benches, and field techs

Schools can standardize one approved Ventoy image per cart of laptops, swapping only the ISO folder each semester. Repair shops keep diagnostic Linux, memory testers, and vendor-specific recovery images on one high-quality drive. Field technicians benefit from a rugged enclosure and a printed checksum list taped inside the toolkit—offline verification when cellular coverage fails.

Supply-chain hygiene: hashes, mirrors, and trust

Download Ventoy only from SourceForge, Gitee, or links published on ventoy.net. Compare SHA-256 hashes after every download. For ISOs, verify against the distributor’s published digest—many projects sign releases with GPG as an additional layer.

If a mirror looks “too fast” to be true or serves executables over plain HTTP on unfamiliar domains, abort and retry from an official mirror.

Performance: boot time, menu rendering, and huge files

Menu load time grows with the number and depth of scanned folders—organize ISOs into clear top-level folders if you maintain hundreds of files. Extremely large images stress both USB bandwidth and firmware USB stacks; patience during first boot is normal.

Offline installs and driver packs

Corporate networks sometimes block Windows Update during imaging. Keep vendor-specific network or storage drivers on the Ventoy partition as separate ISOs or folders, but never mix unsigned driver bundles from untrusted forums with production machines.

Rescue workflows: BitLocker, disk images, and forensics

When a laptop will not boot Windows, a live Linux ISO from Ventoy can mount volumes read-only for inspection—avoid writes until you understand BitLocker status. Forensics-oriented distros assume legal authorization; use them only within policy.

How Ventoy differs from other multiboot approaches

Approach Strength Typical trade-off
Ventoy Drop-in ISO/WIM files, frequent updates Some exotic images need per-entry tweaks
Single-image tools (e.g. Rufus) Simple, one job at a time Reflash for every image swap
Grub-only custom USB Fine-grained control Higher manual maintenance

Comparisons are illustrative; tool features change over time.

Additional frequently asked questions

Can I run Ventoy’s installer from a read-only network share?
You should extract the release to a local disk first. Running installers from flaky shares risks incomplete writes to the USB.
Does Ventoy replace my GRUB on the internal disk?
No—Ventoy lives on the removable device. Internal boot loaders change only if you run another OS installer and direct it to modify internal partitions.
Why does my antivirus quarantine Ventoy files?
Boot-related tools sometimes trigger heuristics. Verify hashes from official releases and follow your organization’s exception process—never disable security blindly.
Can I encrypt the entire Ventoy stick?
Full-disk encryption interacts badly with how Ventoy exposes ISOs at boot. Research project documentation and forums before attempting non-standard layouts.

OEM laptops: Lenovo, Dell, HP patterns

Business lines often ship with “boot guard” or custom firmware policies. IT departments may whitelist only certain boot loaders—coordinate with your administrator before using Ventoy on corporate hardware. Consumer lines usually offer a one-time boot key but hide it behind “advanced startup” flows in Windows.

Testing Ventoy ISOs inside virtual machines

Hypervisors can boot from a physical USB passed through to the VM—useful for quick validation without rebooting metal. USB passthrough quirks vary: assign the whole stick to the VM, not a single partition, unless the docs say otherwise.

Automation and scripting around ISO drops

Teams sometimes script copying ISOs from a network share to the Ventoy partition overnight. Use robust copy tools that verify file size after transfer, and log failures—silent partial copies cause mysterious boot errors.

Backing up data before you repartition

The Ventoy installer destroys data on the target USB. Anything not backed up elsewhere is gone. For sticks that also held personal files, sync to cloud or a second drive first.

LUKS, BitLocker, and bootable media

Ventoy exposes ISO contents; unlocking encrypted volumes is still the job of the operating system you boot. If you need to rescue BitLocker-protected disks, have recovery keys available before you boot a live environment.

ARM64 UEFI and mixed-architecture ISOs

Some ARM laptops use UEFI with ACPI or DeviceTree—compatibility with generic x86 ISOs is impossible. Always download ARM-specific installer images for ARM hardware. Ventoy’s role is unchanged: it routes boot to the image you select, but the image must match the CPU architecture.

Legacy BIOS edge cases

Old systems may cap bootable USB sizes or require ZIP-drives-style tricks. If BIOS offers only “USB-FDD” versus “USB-HDD,” experiment once with documentation in hand—mis-clicks here waste hours.

Getting help on forums without noise

Post firmware version, Ventoy version, partition style, and the exact ISO filename plus checksum status. Screenshots of the Ventoy menu help; blurry photos of unrelated errors do not. Search before opening duplicate threads.

Reading Ventoy changelogs productively

Releases often call out specific ISO families, Secure Boot changes, or filesystem fixes. Skim the entire notes—not only the headline feature—before you blame user error for a regression that was already fixed upstream.

Mirrors, CDNs, and download integrity

Release assets on SourceForge, Gitee, and other official mirrors may propagate slowly after a publish. If hashes do not match, you might have caught a partial download—clear browser cache, retry, or switch mirrors before filing a bug.

WIM, VHD(x), and EFI payloads beyond classic ISOs

Ventoy advertises support for multiple payload types. Each has caveats: VHD scenarios may assume Hyper-V or specific boot loaders; EFI files must match firmware architecture. Validate against the official compatibility tables for your exact Ventoy version.

Themes, backgrounds, and menu branding

Community themes can make menus friendlier for non-technical users—label entries clearly (“Windows 11 24H2”, “MemTest”, “Ubuntu 24.04”). After theme updates, confirm text remains readable on both UEFI and legacy boot paths if you support both.

Persistence files: sizing and maintenance

Allocate enough space for package updates on persistent live systems—small persistence files fill quickly. Periodically prune package caches from the persistent volume using the live environment’s tools.

Advanced troubleshooting sequence

  1. Confirm the USB boots on a second machine—rules out single-PC firmware bugs.
  2. Downgrade or upgrade Ventoy one release at a time to bisect regressions.
  3. Test with a minimal ISO (small Linux) to isolate image-specific failures.
  4. Capture photos of firmware boot order and Secure Boot state (without sharing serial numbers publicly).
  5. Open a forum thread with structured data rather than “it does not work.”

Quick acronym reference

  • CSM — Compatibility Support Module (legacy BIOS layer in UEFI firmware).
  • ESP — EFI System Partition (FAT-formatted partition firmware reads first).
  • PXE — Network booting (orthogonal to Ventoy but appears in IT discussions).
  • TPM — Trusted Platform Module (Windows 11 requirements).

Pre-boot checklist (printable habit)

  • Ventoy version noted; ISO checksums verified.
  • USB labelled physically if you carry multiple sticks.
  • Recovery path for BitLocker or FileVault documented if touching customer machines.
  • Power adapter connected for firmware updates or long installs.

Where to go next on ventoy.net

Pair this page with the official plugin list, tested ISO list, and news archive. Translate forum advice cautiously—hardware from 2014 and 2024 behaves differently even when symptoms sound identical.

Suggested learning path for newcomers

  1. Install Ventoy on a spare stick you can afford to wipe.
  2. Add one Linux live ISO and one Windows installer; verify both boot.
  3. Introduce persistence or themes only after the basics feel stable.
  4. Document your own quirks (laptop models, required firmware keys) in a private note for next year’s you.

This extended block ends here; scroll up for downloads, installation steps, and primary troubleshooting.